
# 安装介质说明和准备
微应用安装介质前提是已经安装AFCenter8.2.6环境。 微应用安装介质有两个:前端介质、后端介质 。 前端目录如下:
Primeton_APIGateway_9.0_LA_Console.zip
├── Developer
│   ├── assets
│   └── static
│   └── index.html
│   └── remoteEntry.js
├── DevOps
│   ├── assets
│   └── static
│   └── index.html
│   └── remoteEntry.js
├── Manager
│   ├── assets
│   └── static
│   └── index.html
│   └── remoteEntry.js
├── esb.conf //nginx配置文件
后端目录如下:
Primeton_APIGateway_9.0_LA_Governor.zip
├── bin //启动脚本
├── config //配置文件
├── db-scripts //部署db脚本
├── governor //模板文件
├── lib //依赖的相关jar
├── com.primeton.esb.governor.boot-9.0.0.0-LA.jar //服务jar
微应用版三员管理说明

APIGayeway微应用版, 必须同时安装AFCenter和APIGayeway微应用版,且必须按照如下步骤安装:

1.先创建AFCenter的数据库,执行AFCenter的初始化脚本。

2.安装APIGayeway Governor,在AFCenter的数据库执行${APIGayeway-governor安装目录}/db-scripts/esb/Mysql/1-esb-afc-data.sql。

3.安装AFCenter。

4.启动AFCenter。

5.启动APIGayeway Governor。
# 安装与配置
# 1.解压介质
获取governor的后端介质包,解压到governor安装目录下。
# 2.执行初始化脚本
初始化APIGateway数据到AFCenter安装的数据库(数据库默认编码为UTF-8),执行{governor安装目录}/db-scripts/如下脚本:
eos/Mysql/eos_all.sql

esb/Mysql/1-esb-afc-data.sql

esb/Mysql/2-schema-esb-mysql.sql

esb/Mysql/3-data-esb-mysql.sql
# 3.连接redis
1.在已经启动的afcenter介质,获取到redis的相关配置:host、port、password
# 4.添加驱动
1.下载MySQL数据库的驱动到${APIGateway-governor安装目录}/lib
| 数据库厂商 | 驱动名 | 版本 |
|---|---|---|
| mysql | mysql-connector-java | 8.0.17 |
| mysql | mysql-connector-java | 5.1.45 |
说明:
1).查看1.1 安装须知
,检查您所需要的数据库驱动包是否已被内置在产品中。如下图
 如果没有内置,则需要删除对应数据库已内置的数据库驱动包版本,放入自己所需要的数据库驱动包
例如:您需要连接的数据库是Mysql 8,但是产品已内置的是Mysql 5的驱动包。您需要将Mysql 8的驱动包拷贝到${APIGateway-governor安装目录}/lib下,然后手动删除${APIGateway-governor安装目录}/lib目录下已内置的Mysql 5的驱动包。
如果没有内置,则需要删除对应数据库已内置的数据库驱动包版本,放入自己所需要的数据库驱动包
例如:您需要连接的数据库是Mysql 8,但是产品已内置的是Mysql 5的驱动包。您需要将Mysql 8的驱动包拷贝到${APIGateway-governor安装目录}/lib下,然后手动删除${APIGateway-governor安装目录}/lib目录下已内置的Mysql 5的驱动包。
# 5.后端修改配置文件
1.打开${APIGateway-governor安装目录}/config/application.properties 修改端口、redis、jpa等配置:
server.port=8080
server.connection-timeout=60000
spring.application.name=ESB
spring.jmx.default-domain=${spring.application.name}
spring.cloud.inetutils.preferred-networks=192.168
spring.pid.file=pid

#spring.profiles.active=eureka
spring.profiles.active=nacos,afc,esb
management.endpoints.web.exposure.include=hystrix.stream,health,info,loggers,eos,mappings
spring.main.allow-bean-definition-overriding=true

server.app-server.min-spare-threads=100
server.app-server.max-threads=500
server.app-server.max-connections=1000
server.app-server.accept-count=200

eos.profiles.active=dev
eos.cache.mode=redis
eos.admin.port=${server.port}

# redis
spring.redis.host=127.0.0.1
spring.redis.port=6379
spring.redis.password=123456
spring.redis.lettuce.pool.max-active=100
spring.redis.lettuce.pool.max-idle=100
spring.redis.lettuce.pool.max-wait=5000

# hibernate
spring.jpa.open-in-view=false
spring.jpa.properties.hibernate.enable_lazy_load_no_trans=true
spring.jpa.properties.hibernate.connection.handling_mode=IMMEDIATE_ACQUISITION_AND_HOLD
spring.jpa.properties.hibernate.new_generator_mappings=false
spring.jpa.properties.hibernate.ddl-auto=none
spring.jpa.properties.hibernate.dialect=org.hibernate.dialect.MySQLDialect
spring.jpa.properties.database=MYSQL

# time format
spring.mvc.dateFormat=yyyy-MM-dd HH:mm:ss
spring.jackson.date-format=yyyy-MM-dd HH:mm:ss
spring.jackson.time-zone=GMT+8
spring.jackson.serialization.write-dates-as-timestamps=false

#swagger
swagger.enable=false

# feign
feign.client.config.default.connectTimeout =2000
feign.client.config.default.readTimeout =1000

#AFC\u90E8\u7F72\u65B9\u5F0F sdk || starter
console.deploy.type=sdk
| 参数 | 说明 |
|---|---|
| server.port | APIGateway-governor服务的端口,默认8080。 |
| spring.redis.host | redis的IP地址,根据实际环境修改。例如:111111。 |
| spring.redis.port | redis端口,根据实际环境修改。 |
| spring.redis.password | redis密码。 |
| spring.jpa.properties.hibernate.dialect | 数据库方言类,默认mysql数据库方言,其他数据库参考高级配置。 |
| spring.jpa.properties.database | 数据库类型,默认mysql数据库类型。 |
2.打开${APIGateway-governor安装目录}/config/application-afc.properties 修改afcenter相关配置:
out.config.folder=config
eos.application.sys-code=EOS-DEMO-SYS
eos.application.sys-key=dc6baaed30e541d78bb91274803d9432


# afcenter
afc.application.name=127.0.0.1:28081
afc.application.tenant=sys_tenant
afc.application.appCode=AFC
afc.application.appSecret=secret

afc.schedule.logs-to-history.cron=0 0 4 1 1/1 ?
afc.schedule.logs-to-history.stay-month-number=2

afc.user.login.filter.enable=true


afc.attachments.persistence-mode=db
afc.attachments.local.dir=
afc.attachments.nexus.repository-url=
afc.attachments.nexus.username=
afc.attachments.nexus.password=
afc.attachments.aliyun-oss.endpoint=
afc.attachments.aliyun-oss.access-key-id=
afc.attachments.aliyun-oss.access-key-secret=
afc.attachments.aliyun-oss.bucket-name=
afc.attachments.libre-office.host=
afc.attachments.libre-office.port=
| 参数 | 说明 |
|---|---|
| afc.application.name | afcenter后端服务的IP和端口。 |
| afc.application.tenant | afcenter的租户编码,默认sys_tenant。 |
| afc.application.appCode | afcenter的应用编码,默认AFC。 |
3.打开${APIGateway-governor安装目录}/config/application-esb.properties 修改APIGateway、elasticsearch相关配置:
#esb restTemplate
esb.business=true
esb.database.init=false
esb.database.enforceInit=false
esb.rest.client.socket.timeout=20000
esb.rest.client.connect.timeout=10000
esb.rest.client.connectionRequest.timeout=10000
esb.rest.client.evictIdleConnections=60
esb.rest.client.ConnectionTimeToLive=60

elasticsearch.enabled=true
elasticsearch.ioThreadCount=50
elasticsearch.connectTimeout=60000
elasticsearch.maxTotal=10000
elasticsearch.maxPerRoute=1000
elasticsearch.numberOfShards=1
elasticsearch.numberOfReplicas=0
elasticsearch.refreshInterval=10s
elasticsearch.username=elastic
elasticsearch.password=primeton000000
elasticsearch.certificate=/usr/local/elasticsearch/elasticsearch-8.1.2/config/certs/http_ca.crt
elasticsearch.hosts[0].ip=127.0.0.1
elasticsearch.hosts[0].port=9200
elasticsearch.hosts[0].protocol=https
| 参数 | 说明 |
|---|---|
| elasticsearch.enabled | 是否启用ElasticSearch,默认为true。 |
| elasticsearch.username | ElasticSearch 的访问用户名,默认为elastic。 |
| elasticsearch.password | ElasticSearch 的访问密码,密码为安装elasticsearch时设置的密码 |
| elasticsearch.certificate | ElasticSearch的证书,该证书为elasticsearch-8.1.2/config/certs下的http_ca.crt文件,文件位置需配置绝对路径 |
| elasticsearch.hosts[0].ip | 配置成安装ElasticSearch的机器IP地址。 |
| elasticsearch.hosts[0].port | ElasticSearch 的启动端口号。默认为9200。 |
| elasticsearch.hosts[0].protocol | ElasticSearch 的http协议,默认https。 |
4.打开${APIGateway-governor安装目录}/config/ESB/config/user-config.xml 修改数据源default配置,其中数据库连接配置需要和AFCenter一致。
<group name="default">
       <configValue key="Database-Type">MySql</configValue>
       <configValue key="Jdbc-Type"/>
       <configValue key="C3p0-DriverClass">com.mysql.jdbc.Driver</configValue>
       <configValue key="C3p0-Url">jdbc:mysql://127.0.0.1:3306/esb?useUnicode=true&characterEncoding=UTF-8&serverTimezone=GMT%2B8&useSSL=false</configValue>
       <configValue key="C3p0-UserName">root</configValue>
       <configValue key="C3p0-Password">root</configValue>
       <configValue key="C3p0-PoolSize">10</configValue>
       <configValue key="C3p0-MaxPoolSize">50</configValue>
       <configValue key="C3p0-MinPoolSize">10</configValue>
       <!-- //seconds, 0 means connections never expire -->
       <configValue key="C3p0-MaxIdleTime">600</configValue>
       <!-- //idle connections never tested -->
       <configValue key="C3p0-IdleConnectionTestPeriod">900</configValue>
       <configValue key="C3p0-MaxStatements">0</configValue>
       <configValue key="C3p0-NumHelperThreads">1</configValue>

       <configValue key="Transaction-Isolation">ISOLATION_DEFAULT</configValue>
       <configValue key="Test-Connect-Sql">SELECT count(*) from EOS_UNIQUE_TABLE</configValue>
       <configValue key="Retry-Connect-Count">-1</configValue>
</group>
| 参数 | 说明 |
|---|---|
| Database-Type | 数据库类型,根据实际环境修改。 |
| C3p0-DriverClass | 数据库数据库类,根据实际环境修改。 |
| C3p0-Url | 访问数据库的JDBC URL,根据实际环境修改。 |
| C3p0-UserName | 数据库用户名,根据实际环境修改。例如:root |
| C3p0-Password | 数据库用户密码,根据实际环境修改。例如:root |
- 如果要使用sap服务器,需要将sapjco.zip (opens new window) 中对应操作系统下的sapjco3.dll和sapjco3.jar文件复制到“${APIGateway-governor安装目录}/lib”目录下
微服务环境,{APIGateway-governor}安装目录/config/下application-afc.properties文件中的eos.application.sys-code和eos.application.sys-key参数需要和
{afcenter}安装目录/config/下application.properties文件中保持一致。
# 前端配置
1.修改{nginx安装目录}/conf/nginx.conf配置文件,新增APIGateway的配置:
location /api/ {# APIGateway配置

        proxy_pass http://IP:Port/api/;# 修改为APIGateway-governor后端IP和端口

}
2.找到已经部署完的介质EOS_Platform_8.2.5的前端部署路径/web/afcenter
3.把介质Primeton_APIGateway_9.0_LA_Console里所有目录,复制到介质EOS_Platform_8.2.5的前端资源/web/afcenter内
如果是独立安装的afcenter,则把Primeton_APIGateway_9.0_LA_Console里所有目录复制到afcenter前端安装目录中。
4.进入{nginx安装目录}/sbin下,执行./nginx -s reload命令重启nginx
# 启动服务
1.在${APIGateway-governor安装目录}下执行如下命令,启动APIGateway Governor
# startServer.bat
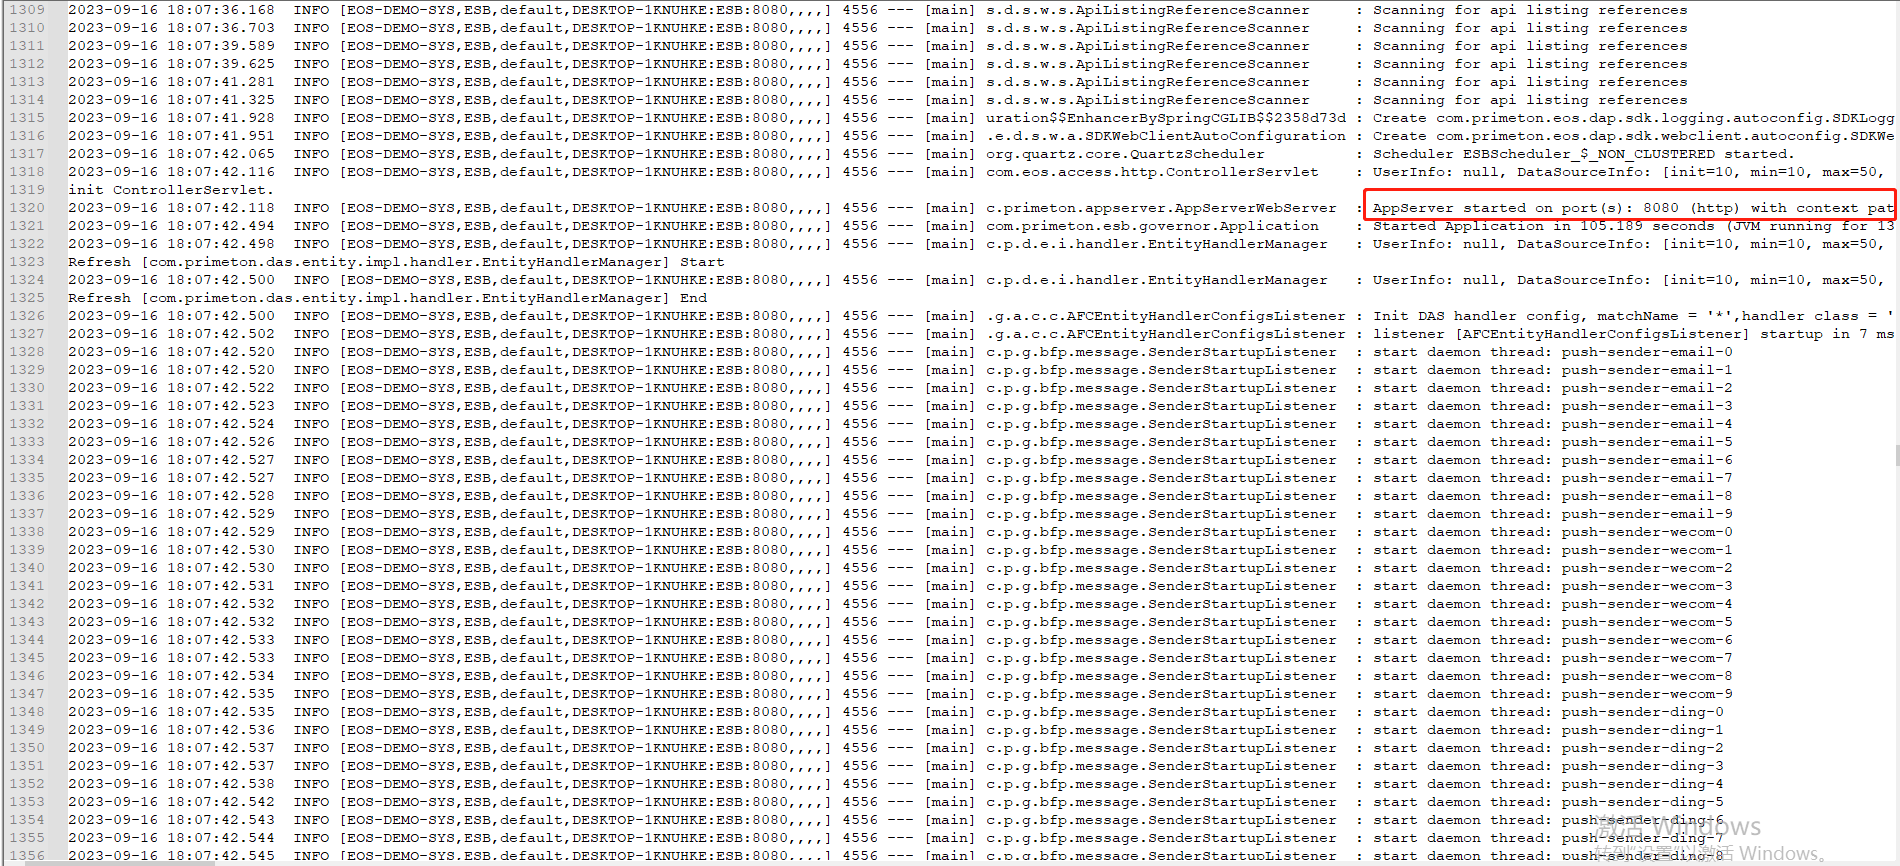
2.启动成功后,进入${APIGateway-governor安装目录}/logs目录,打开eos-trace.log文件 查看具体日志,如下图所示:
# 环境登录和验证
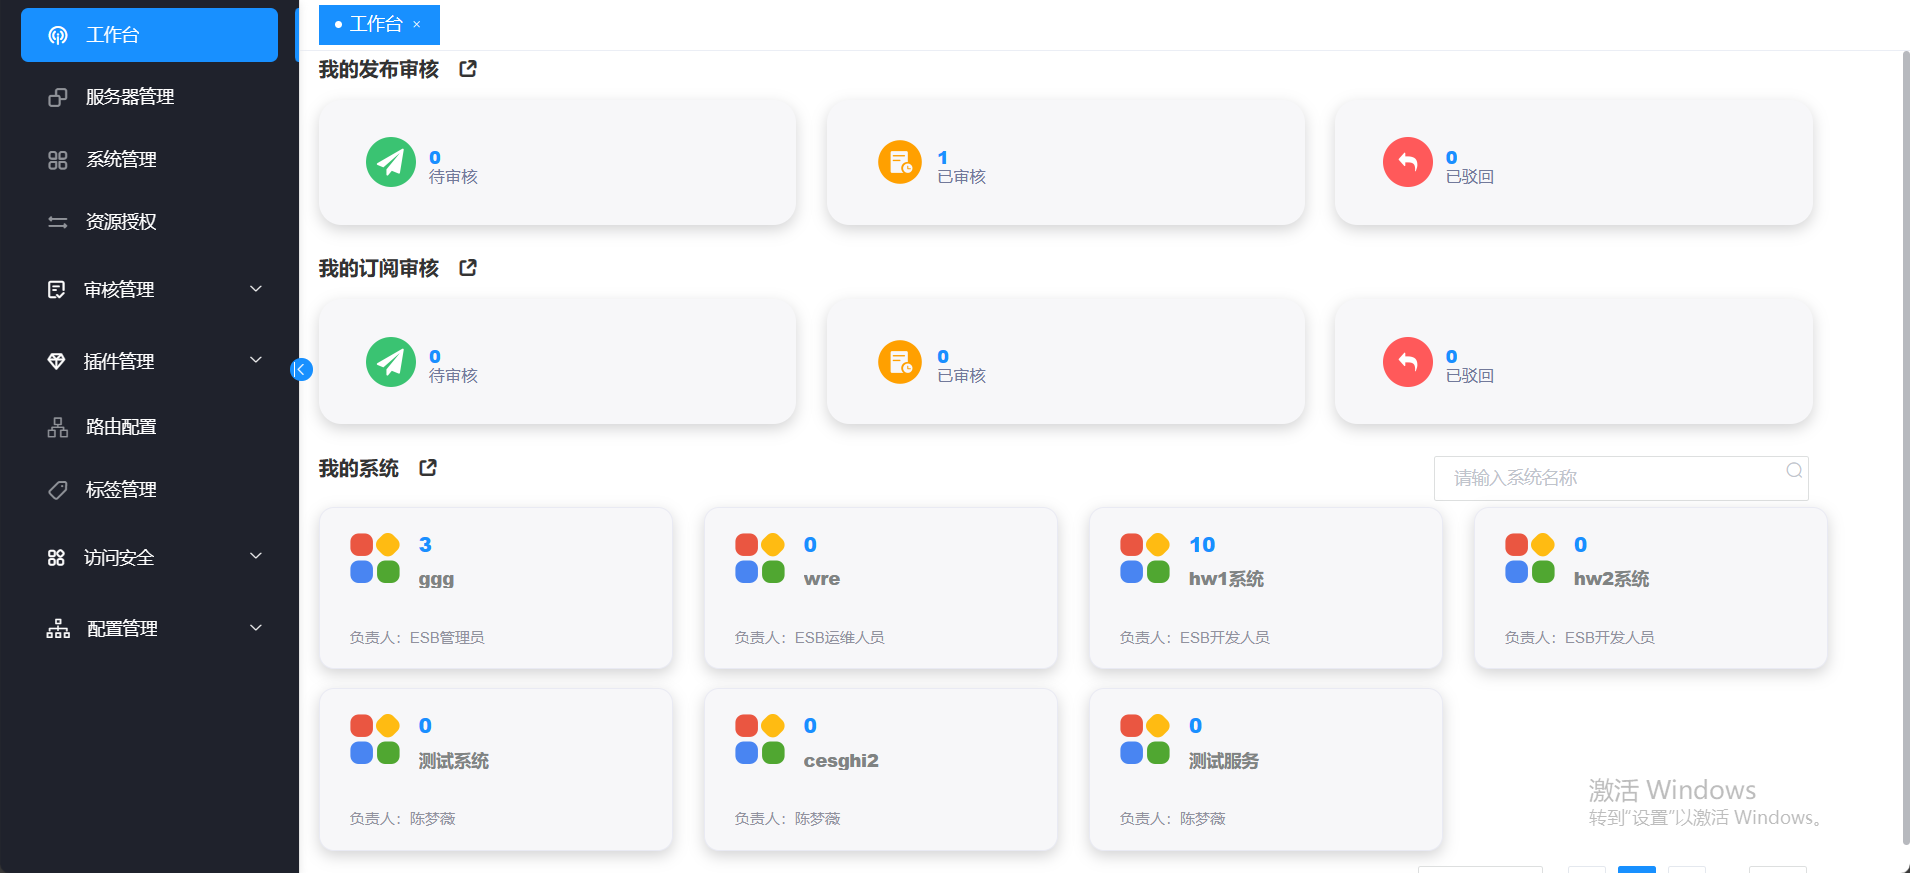
1.访问http://nginx机器IP:前端Port,使用APIGateway管理员登录,用户名/密码为:manager/000000,进入如下界面,表示APIGateway Governor系统部署成功,如下图所示:
此版本支持三员管理,三员管理分为系统管理员、安全管理员、安全审计员

系统管理员负责创建用户、删除用户,系统管理员用户名:systemadmin,初始密码:000000

安全管理员负责给用户分配角色,角色权限设置,安全管理员用户名:security,初始密码:000000

安全审计员负责查看Governor操作日志,安全审计员用户名:audit,初始密码:000000

备注:

1.如果连续 5 次输入错误密码,则用户会被锁定 30 分钟

2.新创建的用户,首次登录后需重新修改密码,默认用户首次登录不需要修改密码,如果需要修改密码,请使用systemadmin用户在账号管理页面,重新设置默认用户的密码
# 卸载
1.在${APIGateway-governor安装目录}下,执行如下命令,停止APIGateway Governor服务。
# stopServer.bat
2.停止服务后,可以直接删除${APIGateway-governor安装目录}进行卸载。